After a recent discussion on one of my knitting forums about the costs of handmade clothing, I thought I would sit down and write up a "ledger" for the cost, in time, of a hand-knit sweater. Before I start detailing exactly how much time goes into knitting a sweater, I want to state for the record that I am, in fact, a fast knitter. My estimates for the knitting section of the process are likely more conservative than those of the average knitter.
Every sweater begins with an idea. It must begin with either a picture in my head of what style of sweater I want to make or an idea of what type of yarn I want to use. Sometimes I already have the yarn on-hand and it's only a matter of finding the right pattern. Sometimes I have the pattern all picked out and need to find a yarn to use. There's usually some sort of spark or inspiration and I move forward from there. To flesh out the idea, I usually spend time on www.ravelry.com, searching their pattern database for patterns that suit my needs. If I already have the pattern picked out, I will take the time to look through the finished sweaters that have been made from that pattern, looking for helpful tips and pointers that will make the knitting go faster. I will also look for color combinations, yarn choice, modifications that people have tried. Assuming that I already have either pattern or yarn on-hand, the rest of this process takes about
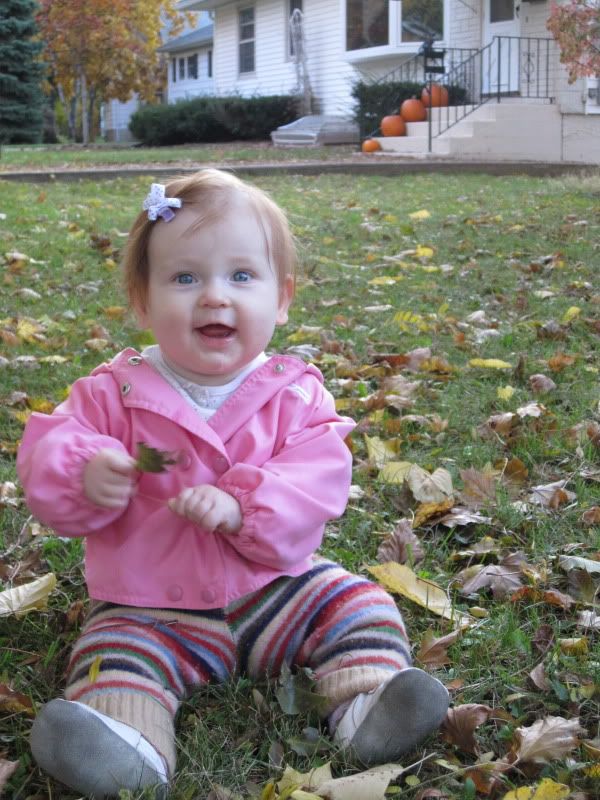
60 minutes. For this article, I had the pattern on-hand and had knit from it before. The pattern is the
Ivyanna sweater, shown here on my older daughter.
If I have to obtain yarn for the project, I have to decide if I want to buy something from an online store, from a local yarn shop, from an online resale forum, etc. I have to decide if I want to buy yarn that has been dyed already or if I want to buy undyed and apply my own palette. Generally, I have some undyed yarn on-hand because I know that there will be a project that I won't be able to find what I'm looking for online or a project that would cost too much to buy the yarn I want predyed. In the case of this example, I had leftover yarn that I had dyed for a previous project, so I did not have to shop for yarn. However, when I initially dyed the yarn, it took me about
6 hours, not including drying time. If I purchase yarn, it will cost me about
30 minutes, not including any driving or shipping time.

Once the yarn arrives, I have to check it to see if it needs to be washed. Often, yarn suppliers will skein or cake their yarn tightly to allow more yards of yarn to take up less space in shipping packages and storage. In order to make the best use of the yarn, I will have to loosen up the yarn again and either allow it extra time to relax and fluff up on its own or I will have to wash it and allow it to airdry. Either process will allow the yarn to bloom and regain its elasticity and regularity. I generally opt to wash the yarn as the washing not only improves the yarn but also helps clear away any dirt or debris that may have come along with the wool. I also find the pre-washing the yarn tells me if the dye is fully set or if I will have to worry about bleeding when washing the finished sweater. Lastly, I prewash because I enjoy the experience of knitting with yarn that has been scented by my wool wash. Who wants to open a project bag to be hit in the face with a faceful of mildew, dust, sheep odors, dye outgassing, etc. Washing takes about
20 minutes plus drying time. Most of that isn't active work, though, unless I have to rewind from cakes to skeins.

Three days later, I get to wind my dried yarn into cakes. I do this by hand because I find that ball-winders put too much tension on the yarn. This leads to shrinking,, twisting, and distorting when the tight sections loosen up over time and end up contracting the fabric. This takes another
30 minutes if I have to do 2-3 skeins.
Buttons can also be another time expenditure. In this case, I chose to sculpt my own decorative and functional buttons after the craft store didn't yield anything appropriate in the right size. This takes about
45 minutes, including baking.
We are now ready to begin knitting. In this case, I do not need to do a gauge swatch as I have knit with this yarn base before at the required gauge and know which size needles I need. Normally, a 4" by 4" swatch would need to be knit one or more times to refine exactly which needle size will produce the correct number of stitches per inch. If I were to be off by as little as 1/2 stitch per inch, the sweater would be 2 or more sizes too big or too small. Knitting a test swatch takes about 15 minutes and if I were to guess wrong on needle size would need to be redone to ensure that the second selection of needle size is correct. I assume
30 minutes for gauge swatching if I'm using a new yarn.
This particular pattern is a quick and easy knit. It only requires about 5 oz of yarn to complete the size 2T sweater. If it had arms and a hood, it would take about twice as long to knit. This sweater took me about 8 hours to knit. A full sweater would have taken me around
16 hours. That's continuous knitting time, not from the date I started until the day I finished the work. I spread that work out over 2-4 weeks generally because I have a job, a family, and other responsibilities. I include in this the time it takes to weave in the typical number of loose yarn ends and attach the buttons.
Once the sweater is knit it must be washed and blocked. No, it's not dirty, but until it has soaked and been arranged to dry, there will be uneven stitches here and there and perhaps some curling of edges. Also, if a lace pattern has been used, blocking allows the lace to open up and become more beautiful. Washing and blocking add another
20-30 minutes of active attention and 3 days of drying.
Once it is dry, I like to take photographs for my portfolio. If the weather is good and the children are otherwise engaged, this process only takes
15 minutes including uploading time.
If I were knitting this for sale on the internet, rather than for my children or a custom order, I would need to invest additional time in photography, listing it online, and monitoring the listing and any follow up emails with a customer. This would cost another
60 minutes or so.
So, where are we on total time invested? If I buy yarn and don't sell online, it costs me 20.3 hours. If I dye my own yarn, it costs me 25.8 hours. What would that translate into if I were paid by the hour? Well, most artists, in any media, charge $20 an hour for custom work.
Assuming $20 an hour, purchased yarn: $406.67
Assuming $5 an hour, purchased yarn: $101.50
Even at $5 an hour, there is no way I can really recoup my costs when knitting for customers. Who will pay me $100 for just the work, not the yarn? So please, remember this when you are purchasing and caring for hand-knit items. You have a sweater because someone either loves you or loves knitting enough to give away their time for peanuts.


 As for sweaters and multiseasonal use, you may be surprised to find that my 2 year old, who wears a size 2T, has a 20" chest where my 4 year old, who wears a size 5T, has a 21" chest. Here is the same sweater on both girls, who at the time of the pictures, were wore size 5T and 18 mos, respectively.
 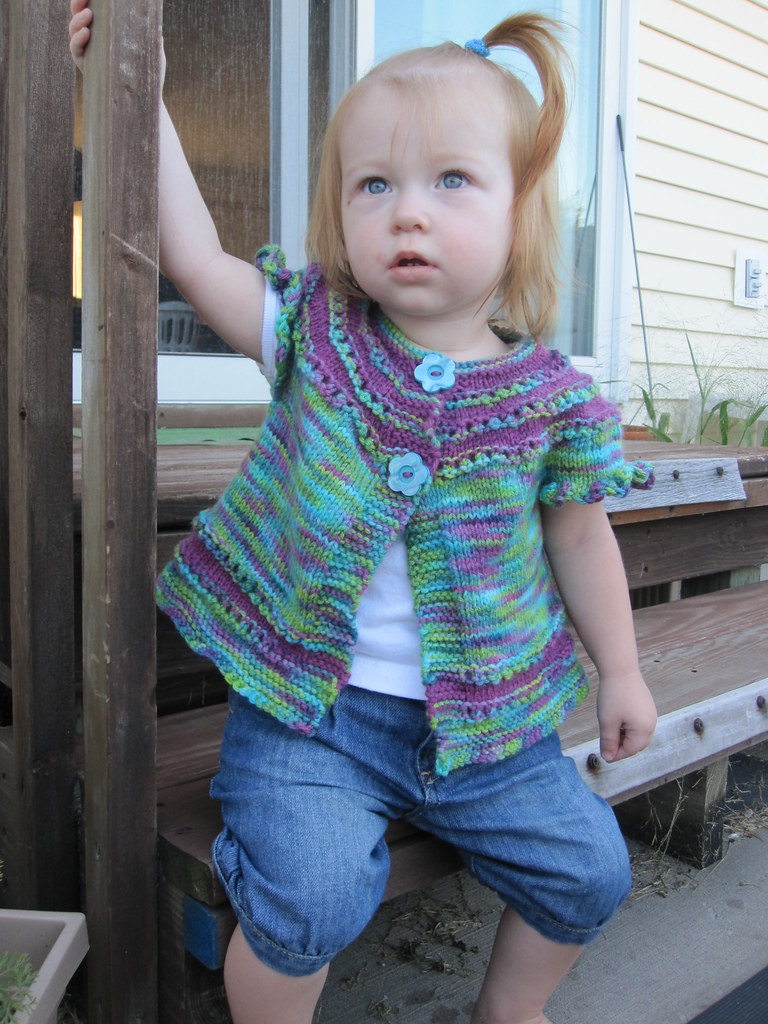 So if I knit up a short-sleeve, or sleeveless sweater, such as in my previous post, I can count on my duaghter to fit into it for at least 2 winters, maybe even three! The biggest difference is the length from neck to waist. In this case, the sweater can be knit long for the toddler and be just a tad short for the pre-schooler, OR I can be smart, save the leftover yarn, and simply undo the hem and knit on a few extra inches when the growth spurts come! Three seasons of wear for only $30 in yarn is NOT bad! And if you remember from my last post, that $30 of yarn actually provided enough yardage for TWO Ivyanna sweaters, so that's two children and 2-3 seasons per sweater, all for $30. This does assume, however, that I knit it myself and not pay someone else to knit it.


