Monday, October 15, 2012

The Hollenhorst Scarf

I was in a knitting funk last week so I decided to pull out my one precious skein of handspun and give it a go.  I figured, if nothing else, I'd at least enjoy playing with the yarn.  In the end, I loved the scarf I made!  Here is the pattern in case you'd like one, too!  It took one 4oz skein of handspun BFL.  It appeared to have been spun to about a worsted/light worsted weight.  The pattern is flexible, though, as it's a SCARF.  Anything DK through worsted would work.  

It couldn't be simpler.  Really.  Try it!
Yarn:
4oz of handspun, worsted/DK weight

Needles:
size 7 (I used size 5s, but I tend to knit loose and require needles 2 sizes smaller than others.)

Gauge:
Use needles sized to reach a gauge that you like.  My scarf, after blocking, is about 5" across

Cast on edge:
CO 21
Row 1: K all stitches
Row 2-6: sl1 stitch  purlwise wyif, K to end

Body of scarf:
Set A:
row 1: Sl1, k1, (ssk yo) four times, k11
row 2: Sl1, K10, P7, K3
Rep rows 1 and 2 three more times for a total of 4 times.

Set B:
Row 1: Sl1, k10, (yo k2tog) four times, k2
Row 2: Sl1, k2, p7, k11
Rep rows 1 and 2 three more times for a total of 4 times.

Repeat sets A and B until almost out of yarn. Make sure to end with a full Set, but it doesn't matter whether you end on Set A or Set B.  I think I left about 2-3 yards before beginning the bind off edge and had yarn left over after finishing.

Bind off edge:
Knit 6 rows of garter st.
BO purlwise.
Weave in ends and block. 


Thursday, September 1, 2011

Pumpkin Seed Hat


The Pumpkin Seed Hat is now live on Ravelry and will soon be available on The Apple Orchard on Hyenacart. Please feel free to leave me comments either here or on Ravelry.com. 

Tuesday, August 23, 2011

Why Wool?

Following up on my last blog entry, I thought that I'd discuss the reasons WHY wool garments are worth the expense.  "Why?" you might ask, is it worth up to $400 in time expenditure to create a wool sweater or longies for a child who will  undoubtedly destroy it or outgrow it in just a few months?

Let's start with the "they'll destroy it" argument.  My children have actually never ruined a wool garment.  Never.  Granted, I'm conscious of their activities and change them into scrubby clothes when needed, but even with near-daily use, they've never destroyed anything I've knit for them.  I have destroyed a few pairs through pure laundry stupidity, but the kids haven't.  Yes, I've had to sew up a hole where the carseat buckle got stuck on the yarn and Daddy pulled a bit too hard to get the child loose, and sure, kids get grubby here and there, usually on the knees or butt.  However, as long as I keep food, paint, and mud away from the woolies, we're good for whatever the day throws at us.

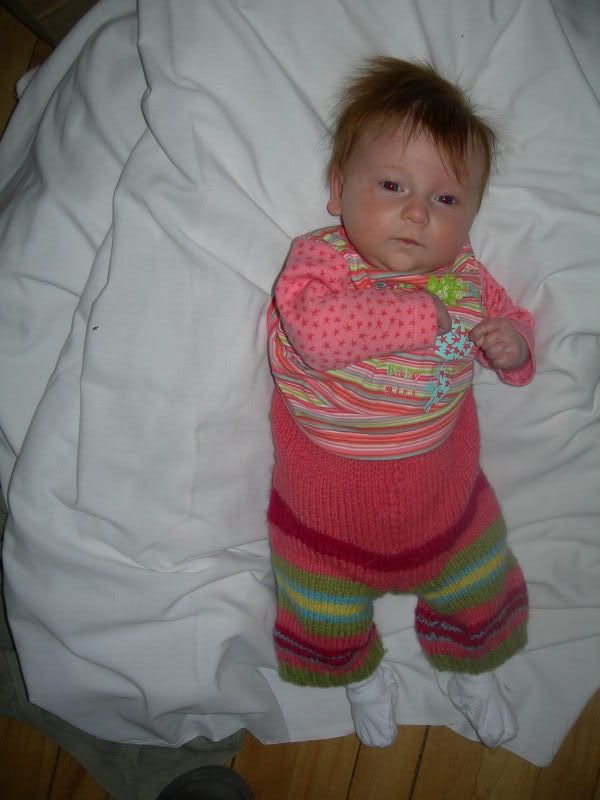
In fact, I have many pairs of longies that both of my children wore.  Here, for example, are both girls in a pair of longies made from an old sweater. You'll want to notice that while my first daughter is only 2 months old when wearing this pair of longies, my second daughter is 8 months old.


Now, the "they'll outgrow it" argument against wool for children.  Let's look first at wool pants, or longies, as they're called.  You'd be surprised to learn that when you cloth diaper a child, their hip circumference and rise measurements don't change as much from early infancy through toddlerhood as you might think.   In the early months, the all-liquid diet of an infant ensures that your diapers will be bulked up enough to fill an 18-19" hip measurement with only a little slack.  By the time your child is potty-training, you'll find that their hip measurement, over those training pants, is STILL 18-19"! So the longies your young infant wore as pants the winter they were born:

  
Are still going to fit them as a toddler, 2 years later.


Sure, your child may be a summer baby and a winter toddler, but there will me multiseason overlap in their wardrobe if you invest in some capris or longies.  

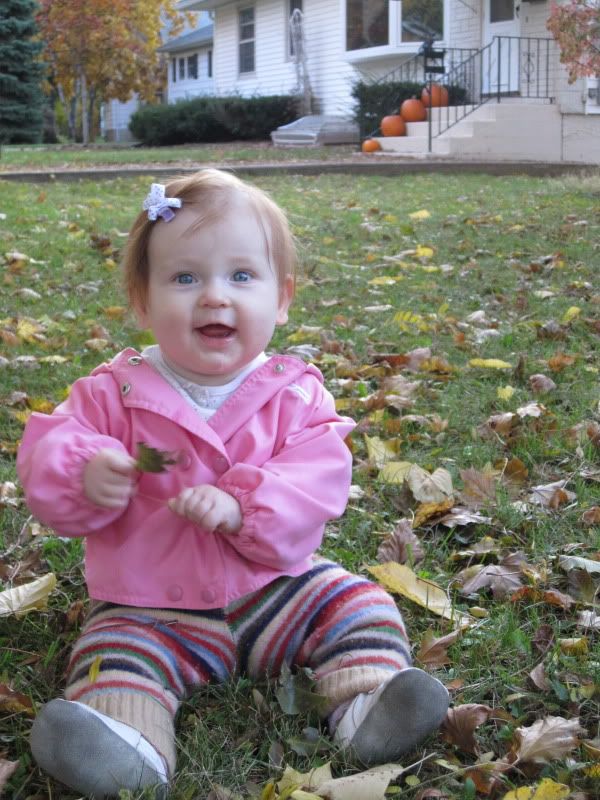
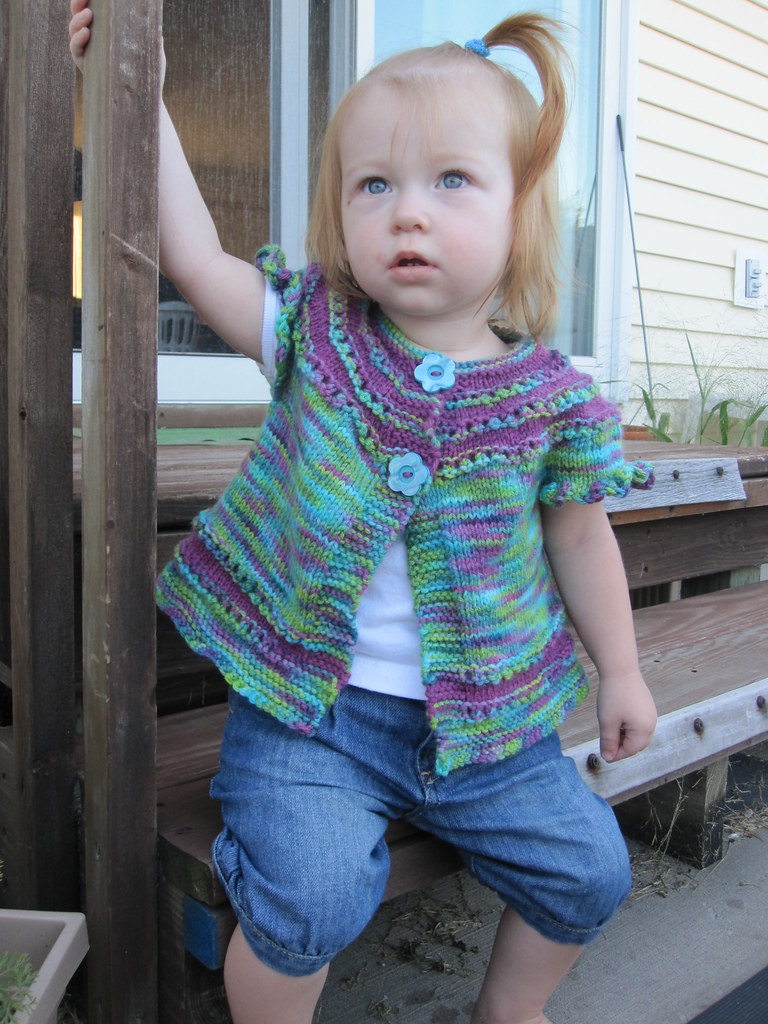
As for sweaters and multiseasonal use, you may be surprised to find that my 2 year old, who wears a size 2T, has a 20" chest where my 4 year old, who wears a size 5T, has a 21" chest. Here is the same sweater on both girls, who at the time of the pictures, were wore size 5T and 18 mos, respectively. 
 So if I knit up a short-sleeve, or sleeveless sweater, such as in my previous post, I can count on my duaghter to fit into it for at least 2 winters, maybe even three!  The biggest difference is the length from neck to waist.  In this case, the sweater can be knit long for the toddler and be just a tad short for the pre-schooler, OR I can be smart, save the leftover yarn, and simply undo the hem and knit on a few extra inches when the growth spurts come! Three seasons of wear for only $30 in yarn is NOT bad!  And if you remember from my last post, that $30 of yarn actually provided enough yardage for TWO Ivyanna sweaters, so that's two children and 2-3 seasons per sweater, all for $30.  This does assume, however, that I knit it myself and not pay someone else to knit it.
Personally, I knit, so my only investment in woolen garments for my children is the yarn and my time.  If I look at really cheap yarn, the stuff that's only $6 for 4oz at your local craft store, you can make a pair of medium-sized longies for only $8 worth of yarn.  A lot of people don't like cheap yarns, but personally, the fact that they felt in the crotch and bum never bothered me since it adds to the ability of the garment to contain diaper blow-outs.  Cheap yarn isn't as soft and it often pills more than expensive yarns.  I have found, though, that after a few rounds of washing and lanolizing, even cheap wool feels pretty nice on the skin.  And as for pilling, I own a sweater shaver and for the once or twice a month that I have to use it, I actually find I enjoy the process.  The kids even fight over the honor of being allowed to run the sweater shaver.  

That doesn't mean that I don't have many woolen garments for my children that are made from expensive yarns. I do.  For the most common expensive yarns used in children's clothing, it would cost me about $30-60 for the yarn for the garment.  "Yikes!" you say.  But let's remember that the child will wear the longies for up to 3 years.  The yearly cost of that item is now $10-20.  My child has non-woolen garments that cost me that much per season's use.  Also remember that longies, shorties, capris, and skirties will double as diaper covers during the first two years (or more!) of your child's life.  This means that one pair of $30 longies can replace 3 diaper covers which would have cost me $45.  

And let's not forget resale value!  Used woolen garments can often be resold online to other cloth-diapering families.  Often, you'll find that you can resell the used garments for at least the cost of your yarn.  So, in the end, a pair of longies that may have cost me $30 in yarn to knit, will save me $15 in diaper cover cost, and sell for $30 when I'm done with them.  Essentially, the longies have just paid me $15 to use them for 3 years.  Do you have any other clothing items that PAY YOU to use them?  I don't!

The final component to why I would encourage you to use woolen garments on your children is the "easily recycled" nature of wool yarn.  I can knit a pair of longies for my daughter, have her wear them for 3 years, and then simply take them apart, wash the yarn, and knit her something new!  Maybe I'll knit her a hat and mitten set, maybe a sweater vest, maybe a pair of slippers... the possibilities are endless.  Fro example, my youngest daughter has in her wardrobe a pair of longies that she wore from late winter to early summer last year and will wear again from fall to spring this year. I have been eying the yarn in those pants with a great deal of longing since they arrived nearly 9 months ago, just waiting for her to outgrow them so that I can have a new winter hat and mitten set!

Thursday, August 18, 2011

What Does a Sweater Cost?

After a recent discussion on one of my knitting forums about the costs of handmade clothing, I thought I would sit down and write up a "ledger" for the cost, in time, of a hand-knit sweater.  Before I start detailing exactly how much time goes into knitting a sweater, I want to state for the record that I am, in fact, a fast knitter.  My estimates for the knitting section of the process are likely more conservative than those of the average knitter.

Every sweater begins with an idea.  It must begin with either a picture in my head of what style of sweater I want to make or an idea of what type of yarn I want to use.  Sometimes I already have the yarn on-hand and it's only a matter of finding the right pattern.  Sometimes I have the pattern all picked out and need to find a yarn to use.  There's usually some sort of spark or inspiration and I move forward from there.  To flesh out the idea, I usually spend time on www.ravelry.com, searching their pattern database for patterns that suit my needs.  If I already have the pattern picked out, I will take the time to look through the finished sweaters that have been made from that pattern, looking for helpful tips and pointers that will make the knitting go faster.  I will also look for color combinations, yarn choice, modifications that people have tried.   Assuming that I already have either pattern or yarn on-hand, the rest of this process takes about 60 minutes.  For this article, I had the pattern on-hand and had knit from it before.  The pattern is the Ivyanna sweater, shown here on my older daughter.


If I have to obtain yarn for the project, I have to decide if I want to buy something from an online store, from a local yarn shop, from an online resale forum, etc.  I have to decide if I want to buy yarn that has been dyed already or if I want to buy undyed and apply my own palette.  Generally, I have some undyed yarn on-hand because I know that there will be a project that I won't be able to find what I'm looking for online or a project that would cost too much to buy the yarn I want predyed.  In the case of this example, I had leftover yarn that I had dyed for a previous project, so I did not have to shop for yarn.  However, when I initially dyed the yarn, it took me about 6 hours, not including drying time.  If I purchase yarn, it will cost me about 30 minutes, not including any driving or shipping time.


Once the yarn arrives, I have to check it to see if it needs to be washed.  Often, yarn suppliers will skein or cake their yarn tightly to allow more yards of yarn to take up less space in shipping packages and storage.  In order to make the best use of the yarn, I will have to loosen up the yarn again and either allow it extra time to relax and fluff up on its own or I will have to wash it and allow it to airdry.  Either process will allow the yarn to bloom and regain its elasticity and regularity.  I generally opt to wash the yarn as the washing not only improves the yarn but also helps clear away any dirt or debris that may have come along with the wool.  I also find the pre-washing the yarn tells me if the dye is fully set or if I will have to worry about bleeding when washing the finished sweater.  Lastly, I prewash because I enjoy the experience of knitting with yarn that has been scented by my wool wash.  Who wants to open a project bag to be hit in the face with a faceful of mildew, dust, sheep odors, dye outgassing, etc.  Washing takes about 20 minutes plus drying time.  Most of that isn't active work, though, unless I have to rewind from cakes to skeins. 


Three days later, I get to wind my dried yarn into cakes. I do this by hand because I find that ball-winders put too much tension on the yarn.  This leads to shrinking,, twisting, and distorting when the tight sections loosen up over time and end up contracting the fabric.  This takes another 30 minutes if I have to do 2-3 skeins.

Buttons can also be another time expenditure.  In this case, I chose to sculpt my own decorative and functional buttons after the craft store didn't yield anything appropriate in the right size.  This takes about 45 minutes, including baking.

We are now ready to begin knitting.  In this case, I do not need to do a gauge swatch as I have knit with this yarn base before at the required gauge and know which size needles I need.  Normally, a 4" by 4" swatch would need to be knit one or more times to refine exactly which needle size will produce the correct number of stitches per inch.  If I were to be off by as little as 1/2 stitch per inch, the sweater would be 2 or more sizes too big or too small.  Knitting a test swatch takes about 15 minutes and if I were to guess wrong on needle size would need to be redone to ensure that the second selection of needle size is correct.  I assume 30 minutes for gauge swatching if I'm using a new yarn.

This particular pattern is a quick and easy knit.  It only requires about 5 oz of yarn to complete the size 2T sweater. If it had arms and a hood, it would take about twice as long to knit.  This sweater took me about 8 hours to knit.  A full sweater would have taken me around 16 hours. That's continuous knitting time, not from the date I started until the day I finished the work. I spread that work out over 2-4 weeks generally because I have a job, a family, and other responsibilities.  I include in this the time it takes to weave in the typical number of loose yarn ends and attach the buttons.

 Once the sweater is knit it must be washed and blocked.  No, it's not dirty, but until it has soaked and been arranged to dry, there will be uneven stitches here and there and perhaps some curling of edges.  Also, if a lace pattern has been used, blocking allows the lace to open up and become more beautiful.  Washing and blocking add another 20-30 minutes of active attention and 3 days of drying.

Once it is dry, I like to take photographs for my portfolio.  If the weather is good and the children are otherwise engaged, this process only takes 15 minutes including uploading time.

If I were knitting this for sale on the internet, rather than for my children or a custom order, I would need to invest additional time in photography, listing it online, and monitoring the listing and any follow up emails with a customer.  This would cost another 60 minutes or so.


So, where are we on total time invested?  If I buy yarn and don't sell online, it costs me 20.3 hours.  If I dye my own yarn, it costs me 25.8 hours.  What would that translate into if I were paid by the hour?  Well, most artists, in any media, charge $20 an hour for custom work. 

Assuming $20 an hour, purchased yarn: $406.67

Assuming $5 an hour, purchased yarn: $101.50

Even at $5 an hour, there is no way I can really recoup my costs when knitting for customers.  Who will pay me $100 for just the work, not the yarn?  So please, remember this when you are purchasing and caring for hand-knit items. You have a sweater because someone either loves you or loves knitting enough to give away their time for peanuts.

Tuesday, April 19, 2011

Back to Basics: the RoPo (RosiePosey) Fold for Flat Diapers, Modified

It's been a while since I've posted anything diaper-related, but as my friends get ready for the birth of their first child, I find myself sharing more diaper information.  So, here is is, the Modified RoPo fold for flat diapers:


Start with your flat diaper laid out neatly.  I like to fold my flats into quarters when warm from the drier and then go back later to fold them up for use. You could do this straight from the drier, though.


Fold in the sides towards the center.  For a smaller baby, fold all the way in or even overlap if you need to.  For a larger baby, leave a gap as shown.


Fold the bottom up to create a rectangle the correct LENGTH for your baby.  This would be the "rise" of the diaper.  I like to add my doubler here so that it ends up somewhat wrapped in the flat.


Fold one side towards the center.  This is a slightly less than 1/3 of the width fold. 

Turn out one corner.  The exact point of the turn out is not critical as this fold will shift when you put the diaper on the baby.


Repeat the previous steps with the other side.


Place the baby on the diaper with the open side at their hips.  I like to pinch the "wad" of the diaper at the crotch before bringing the front up.  This reduces the bulk a bit.


Spread out the front corners of the diaper across the baby's hips.

Tug on the corner of one of the wings behind the hips.  The goal is to loosen the part under the buttcheek so that the fabric will create a pocket to catch poo.  Go ahead and tug pretty hard, you can't pull too much out on accident.


Wrap the wing over the front and secure with a pin.  You could, potentially, use a snappi depending on the diaper fabric.  Personally, I like pins for flats.


Repeat for side 2.


This is how it should fit.  You can create a pretty low-slung diaper for an older baby or a higher-rise for the Poo-Master newbie.  This truly is an all-sizes fold as it is customizable for width, length, and absorption.

Tuesday, October 19, 2010

The Crocs Socks


Here's a little pattern I worked up last weekend.  I don't know if my notes are clear enough for someone else to follow.  If you knit this, please feel free to send me comments either here or on Ravelry.com.  I'd love to hear what you think.  I plan to add pictures as soon as I can.

These socks fit an average woman's foot.  You could use DK weight and decrease your spi to make them fit men.

Materials:
I used one 2oz ball of fingering/sock weight yarn and size 2 needles, both 9" circ and DPNs.
Also needed: stitch markers, stitch holders or spare DPNs to use as holders, tapestry needle.

gauge: 
7 stitches per inch in stockinette stitch

cast on:
co 38 with the long-tail method.
ankle:
R1: sl1, P6, sl1, P to end
R2: sl1 K6 sl1 (K1, sl1) until there are 7 stitches left, k7
Repeat R1-2 until 12 rounds total.

heel:
Place first 7 and last 7 stitches on holders.
continue heel piece in (sl1, K1) pattern as above until a total of 15 rounds or 30 rows have been knit.

turn heel:
Turn heel (P14, P2tog, P1, turn, ETC.) until 14 stitches remain.  For a quick tutorial on how to do this, look here.  Since this is a standard technique, I didn't write it all out.  What can I say?  I'm lazy sometimes.

constructing the arch section:
R1: pick up+ 9 stitches along side of heel flap, K1 stitch off holding needle, slip previous stitch over this stitch knitted off the holder (the last stitch picked up on side of heel.) turn.
R2: sl1, P to top edge of heel flap (9+14 stitches) pick up 9 stitches along other side of heel. K1 stitch from holding needle, slip previous stitch over as before.
R3: sl1, K to 1 st before holding needle, sl1, K1 from holder, psso. turn.
R4: sl1, P to 1 st before holdling needle, sl1, P1 from holder, Psso. Turn.
Repeat R3 and R4 until all but one stitch has been removed from holder.
complete R3 again but instead of turning, pick up 6 stitches along the edge of the ankle piece knit with the initial 12 rows. turn.
(K1, P1) 3 times, P to last stitch on needle and complete this row as R4 above. DO NOT TURN. Pick up 6 stitches along the edge of the ankle piece, turn.
(K1, P1) 3 times. K to last 6 stitches, (p1, K1) 3 times. CO 13 stitches and join in the round with ribbed section on opposite side of the ankle, placing a round marker.
 
Working in the round:
R1: (K1, P1) 3 times, K to ribbing, (P1,K1) three times, continue ribbing pattern across to end of round.
R2: (K1, P1) 3 times, place marker, K1, ssk, K to 3 stitches before ribbing begins, K2tog, K1, place marker, (P1,K1) ribbing to end of round.
Repeat R1-R3 until 49 stitches remain in total.  Yes, 49.  You cast on 13 stitches across the top of the foot to keep in K1P1 pattern so it's uneven.  Now you'll remove the asymmetry by K2tog once at the center of the bottom of the foot, roughly 12 stitches from the ribbing section.
Continue in pattern until sock measures 2” less than desired length.

Toe decreases:
one row of K and then decrease as standard and kitchener graft to seam up.
If you don't know how to do this, read on!

You will want to switch to your DPNs now.  Place a marker  on either side of the ribbing.  Now remember, you have 25 stitches in ribbing pattern and 23 stitches in stockinette.  You'll want to place your markers just slightly off so that you have 24 st between each marker.  Designate one of these markers the round marker.

R1: K
R2: K1, ssk, K to 3 stitches before marker, K2tog, K1, sm, ssk, K to 3 stitches before marker, K2tog, K1.
R3: K

Repeate R2-3 until 8 stitches remain between each marker, a total of 16 stitches in total.

Use a kitchener graft to close up the toe.

DONE!

The story behind this pattern is this:  My family and I were perusing a local yarn shop a few weeks ago just for fun and my husband saw a pattern for socks similar to the above.  He said, "You should make some of those for yourself!"  I wasn't sure if I'd like them or not so I didn't want to spend the money on the pattern.

Fast forward to this past weekend when we were on a road trip.  I had packed a sock project to work on and thought that was all I'd need.  Lo and behold, my husband decided he didn't want me to use the yarn I had with me to make a gift for someone else ("It's too nice, you should make yourself something with it."  See?  He's always looking out for me because he knows I don't make much for myself.) So suddenly I had a 10 hour car trip and no busy work!  We stopped at Hobby Lobby and picked up a ball of sock yarn and I decided I'd take a stab at something like the sock pattern we'd looked at a few weeks prior.

The pattern above is the result.  I wasn't sure I'd like them still, even when I had them done!  Until I wore them with my crocks.  LOVE!

Saturday, July 24, 2010

Learning to Love Flat Diapers


I recently was forced to make drastic changes to our cloth diaper stash. I'll be the first to admit that I'm always up for trying new diapers, but this time, I was forced into using a diaper that I had tried time and time again with both of my girls and never found any love for. The Flat Fold Diaper.

Traditionally, flat diapers were made of cotton birdseye or cotton gauze. In fact, when I was expecting my first child, my mother gifted me with 2 dozen gauze half-flats from my own childhood. I was excited by this gift because half of the reason I wanted to use cloth diapers was because it was the "traditional" way to do things. If it worked for Mom and Grandma, why shouldn't it work for me?

Well, my firstborn turned out to be a heavy wetter. And I do mean heavy. I could not get the gauzy cotton flats to hold enough pee or create a tight enough seal to keep the pee in if I doulbed them up. So I used them for burprags. They made great burp rags.

For my second child, I was inspired to try flats again when she was tiny when I learned about the origami fold. I love origami and thought that maybe that fold would work better than what I had been trying with my older child. Also, my second baby was NOT a heavy wetter so I had better chances of loving them. In the end, I did not. Using traditional birdseye flats, the origami fold was too small for her waist and using flannel receiving blankets with the origami fold created diapers that were not only too big but too absorbant and bulky. I just couldn't find a happy medium.

Flash forward to a few months after our move into the new house. A new house means a new washer and dryer and a new water supply. All of those things, means a new washing routine. I struggled to find a washing routine that would conquer the stinkies in my daughter's diapers. It seemed like I could go only about a week before I had to do something drastic like stripping them or using bleach on them. I wasn't willing to do that many intensive washes. It was making cloth diapering much less appealing!

While searching for more hints on handling the stinkies, I came across a thread on my diapering forum extolling the virtues of flat diapers. Again, I thought, it's too bad I don't like flats because they would be easy to keep clean. One single layer of fabric would come clean for sure, no matter what my washing routine was! But I remembered hating flats. Ugh.

As I read through the thread, I noticed that a lot of mamas were using a folding pattern that hadn't been publicized when I had last tried flats. After looking at it and trying it out on the flat diapers I had at home, I realized that I just might like it enough to try flats again. So, out came the receiving blankets. Out came the flat diapers. Out came the pins.

And wouldn't you know, after only one small modification to that RoPo fold, I was loving the flat diapers on my younger daughter. Seriously, I love the act of folding them. I love the sense of tradition in using flat diapers and pins. I love the fact that laundry is a breeze. The stinkies are gone and flat diapers dry in a single cycle of the dryer, unlike other diapers which can take up to 2 hours in the dryer plus overnight hanging to dry.

The added bonus to using flannel receiving blankets as flat diapers is all the fun color that shows up in your stash! I have been picking up blankets at garage sales and resale shops all summer long and am really enjoying the different colors and prints. Since I"m buying used, a lot of my blankets are available in colors and styles that I couldn't find in the store today.

As I've added new blankets to my stash, I have come to have a great appreciatioan for the art of gender-neutral prints. There was once a great need for gender-neutral blankets as no one knew whether they'd have a baby girl or a baby boy. The prints in these older blankets are by far my favorites as they are so carefully drawn and have some truly great color schemes in them. Take a peek at some of my favorites!

Tuesday, October 13, 2009

Pork Tenderloin Recipe Success

I'm always trying to find new ways to cook pork tenderloin. It's always a favorite cut of meat in our household because it comes vacuum packed, giving me a few extra days to get around to cooking it before it goes bad.

I can't take credit for this one, but can't find the link either, so here it is, without me taking any credit.

Maple Pork Tenderloin
1 tenderloin
splash of oil for pan
1 tsp sage
salt, pepper

3T maple syrup
3T vinegar (apple cider or in a pinch rice wine)
1t dijon mustard

Rub the tenderloin with the sage, sprinkle with salt and pepper. Brown the tenderloin in a pan with a splash of oil to keep it from sticking. This should take about 6 minutes on med-hi. Lower the heat to med-low and cover. Cook an additional 10 min or so until temp is 150F. Remove from pan and keep warm.

Wisk together 2T maple syrup, 2T vinegar, and dijon. Place 1T vinegar in pan and heat until bubble, scraping the pan to bring up brown spots.

Add maple mix to pan and heat until it thickens, return pork and turn for an additional 2 min.

Remove pork from pan. Add the additional 1T maple syrup, heat, and pour the juices over pieces of pork.


I served it with polenta and butternut squash and was tempted to make a cranberry sauce for it. Maybe next time.

Tuesday, September 29, 2009

Cloth Diapers 101, as promised

Okay, so please understand that I'm writing this for those of you who have already decided to cloth diaper. I'm not going to spend any time trying to convince you that cloth diapers are better for the environment, better for the baby, better for you, etc. You already know this.

In this post, I hope to cover some basic definitions for the types of cloth diapers and covers that are available as well as some places to purchase them and some online resources for more information. Please let me know if there are any glaring omissions, or if you'd like to add something. I plan to lay out a basic outline and then fill in the slots as I have time, so if it looks half-written, that's because it is. Please be patient with me. I have two children and work part time, so this is going to have to be piecemeal.

CLOSURE TYPES:
snaps
aplix (velcro)
pins
snappi
prefold belts

DIAPER TYPES:
Flats:
These are your grandma's cloth diapers. Literally. They are cotton squares of birdseye, muslin, or flannel that have either finished edges or pinked edges. They come in bleached, unbleached, dyed, tie-dyed, embellished, you name it. They are inexpensive, wash well and dry easily. They do, however, require folding to use. The folding can be as easy as making a multilayered rectangle or as complicated as an origami sculpture. It all depends on what sort of performance you want out of them. They can be folded specifically for boys or girls, doubled for toddlers or left singly for newborns. You can add a doubler (multilayered single-unit sewn piece) to add absorbancy exactly where you need it. They must be closed with either pins or a snappi or a tight-fitting wrap-style cover. These can truly be a one-sized diaper that you use from birth to potty.

Flats are sold singly for approximately $1.25 each or in dozens for $15 or so.

Prefolds:
Prefolds are similar to flats in that they are generally comprised of a cotton birdseye. The name prefold comes from the fact that prefolds are sewn to resemble one of the most basic flat-diaper folding techniques, thus saving the parent the time they would need to fold a flat. The are rectangular and have usually 2-4 layers on the outside edges and 6-8 layers in a strip down the center. This provides absorbancy where you need it and less bulk at the hips where you don't need it.

Prefolds come in:
  • bleached cotton
  • unbleached cotton
  • hemp
  • bamboo
  • dyed
  • tie-dyed
Prefolds come in the following traditional sizes and also additional "gourmet" sizes that are more square than rectangular:
  • preemie
  • infant
  • regular
  • premium
  • toddler
You will have to buy several sizes as your baby grows, but at around $20 for a dozen, it's still a very affordable diaper. You will also find many other uses for prefolds both while your babies are young and afterwards. They are truly a useful item to have on-hand.

Prefolds can be folded further by methods such as: (links to come later)
  • diva fold
  • newspaper fold
  • angel fold
  • jelly roll
  • bikini twist
Prefolds are usually fastened with either pins or a snappi, but can be trifolded and lain in a tight-fitting wrap-style cover to hold them in place.

preflats:

Preflats are very similar to prefolds. They are rectangular hemmed fabric with a thicker strip down the center. The main difference between preflats and prefolds is the material they are made of. Prefolds are made from cotton and preflats are usually rayon made from bamboo. Because bamboo fabrics are more absorbant than cotton, the preflat usually has fewer layers both on the edges and in the center than a standard prefold does. The use of prefolds is generally identical to that of prefolds.

Because bamboo rayon is a more expensive fabric to purchase, preflats are usually about $15-20 per diaper. Examples of preflats include PB&E, Cake, and Buckaww.

contours:
Contoured diapers are similar to fitted diapers except that they do not have elastic at the waist or leg openings. They are generally pinned or snappied to fit and worn under a cover. Contours are usually made of cotton. Contures are usually priced in the $6-10 range.

Kissaluvs brand makes contour diapers.

fitteds:
Fitted diapers are much like a reusable version of a disposable diaper. They are shaped to fit your baby with elastic at the waist and leg openings and usually have some sort of closure system built in. Closures are usually aplix (velcro) or snaps but can sometimes be ties, buckles, or some other system. Some fitteds are without closures to allow the parent to use pins or a snappi for a perfect fit.

Fitted diapers can be made from:
  • cotton
  • hemp
  • rayon from bamboo

and may include other types of man-made fibers as soakers (absorbancy boosters.)
The inner layer of some fitted diapers is microfleece or suedecloth to create a layer that allows water to pass through to the absorbant materials but not feel wet on the baby's bottom. This is a nice feature, but introduces non-organic fibers, which some parents do not care for. Also, some babies have shown a sensitivity to suedecloth.

The outer layer of fitteds is usually a printed fabric. Some mothers become collectors of a particular brand of fitteds and try to own all of the prints available. A stack of fitted diapers on a shelf can be quite colorful, if you have an eye for prints, and some mothers use them as decor in the child's room. For this and other reasons, fitted diapers can be the most expensive type to build your stash with. Fitted diapers generally range from $10-$40 per diaper when purchased new.

Fitted diapers can have either internal soakers or external soakers, meaning that sometimes the soaker materials are sew into the layers of the diaper and sometimes they are attached to the body of the diaper by snaps or stitches. Diapers with internal soakers can be easier to put on a baby, especially in the night, but diapers with external soakers dry faster after laundering. A third, less common, style is the pocket fitted. A pocket fitted has an opening at the back edge of the diaper for the parent to insert whatever absorbant pieces they choose.

Fitted diapers do not have a waterproof layer and must be used with a cover or wool/fleece pants.

Examples of fitted diapers include Goodmamas, Sandys (by Motherease), and Bagshot Row Bamboo diapers.


all-in-ones:
All-in-ones, or AIOs as they are referred to, are the closest to a disposable diaper that you can come without actually disposing of anything but solid waste during the cleaning process. They are shaped like a fitted with elastic and a closure system, but also have a waterproof outer layer to hold the contents and moisture in.

The absorbant layers are permanently attached to the waterproof layer and the whole diaper is washed after a single use. Most AIOs have internally sewn soakers but a few have external, flappy soakers to aid it drying time. AIOs tend to take the longest to dry as the waterproof layer also prevents the warm air in the dryer from blowing through the absorbant layers and drying them.

AIOs are often a good choice for newborns, grandparents, babysitters, and daycares as they require the least amount of thinking and preparation for use.

AIOs range in price from $15-$30 per diaper.

all-in-twos:
All-in-two, or AI2s as they are called, are very similar to AIOs except that the absorbant layers are removable. There are two advantages to an AI2 system over an AIO:

  • the waterproof shell can be reused multiple times if it does not get pooped on. You simply snap in a new soaker and reuse the shell.
  • the AI2 soakers often dry faster than an AIO as the lack of a waterproof/windprood barrier allows the warm air to do its work more quickly.
The first of these advantages my be negated when diapering a very tiny baby as the poop of a breast-fed baby is often both liquid and explosively expelled. This means that chances are very good that the baby will poop on the shell with every use, not allowing you to simply snap a wet soaker out of a clean shell.

AI2s generally cost $20-25 for one shell and one soaker, with additional soakers costing $6-$15 each. An example of an AI2 diaper is Grobaby.

pockets:
Pocket diapers are very similar to AI2s and AIOs. They involve a waterproof outer later and usually a stay-dry inner layer, elastic, and closures. However, instead of snapping soakers in or having a sewn-in absorbant soaker, pocket diapers have an opening along the back or front edge that allows the parent to insert absorbant materials. After use, the insert is removed and washed along with the pocket. After drying, the inserts must be repacked for the next use, much like an AI2.

Pockets have the advantages of being quick to dry and easy to put on as a single piece diaper. The disadvantage is mainly in the initial prep-time.

Pocket diapers are usually $15-$20 per diaper and often come with an insert. The most common insert materials are:
  • microfiber
  • hemp
  • bamboo
  • cotton prefold diapers, tri-folded
Examples of pocket diapers include Fuzzi Bunz, Rocky Mountain Diapers, BumGenius, and Knickernappies.

COVER TYPES:
With most cloth diapers, you will need some sort of waterproof barrier to keep your baby's clothes and your lap dry. There are many more options today than there were 30 years ago when my parents were diapering me. Thankfully, there are so many good ones that it's difficult to pick just one favorite style!

pull on nylon taffeta:
Nylon taffeta pull-on pants are the style of cover that most closely resembles what our parents used on us. They are a simple shower cap style pant with elastic at the legs and waist. They pull on and off like undies.

The advantages to these covers are:

  • inexpensive
  • easy to use (no confusing closures)
  • difficult for toddlers to remove
  • compress easily under clothing
They are inexpensive ($2.50-$6 per cover) and are available from a number of companies. They are usually sold in white but can easily be dyed by soaking them in unsweetened Kool Aid. Companies that sell these types of covers include Dappi, Bummis and Basic Connection.


pouf-style pull-on, snap-off:
This style of cover, often called POSO, is a hybrid of the pull-on cover and the wrap style cover. It can be either pulled on and off or snapped on and off, or any combination of the two. This comes in handy when the baby poops and you'd rather not slide the slimy cover down their legs.

These covers are more expensive than pull-on styles and are comparable in price to wrap style covers. Prices are typically $12-15. Examples of POSOs are Mother-Ease Airflow (MEAF) and Blue Penguin POSO.


MORE TO COME:
wrap style (snap or aplix)
gussets and why you might like them
WAHM style
fleece
wool (wraps, soakers, shorties, capris, longies, skirties)


STORES that I can personally recommend:
www.nickisdiapers.com
www.little-lions.com
www.greenmoutaindiapers.com
www.thenaturalbabyco.com
www.sewcraftybaby.com
www.bananapeels.com
www.fishnoodles.com

ONLINE RESOURCES:
www.diaperpin.com
www.diaperswappers.com
www.greenmountaindiapers.com
www.realdiaperassociation.org

Monday, September 28, 2009

Homemade Bread

Yogurt Bread
2 pkg yeast
1.5 C warm water
1C yogurt
1Tbsp salt
5-6 C flour

I made this in my Kitchenaide mixer. I put the yeast and warm water in the bowl and let it get fizzy. Ass yogurt and salt. Mix on 2 and add flour slowly. Allw mixer to kneed the bread for 5-10 min on speed 2-3.

Allow the dough to rest for 30-60 minutes.

Use the mixer to punch down the dough for 5-10 seconds.

Kneed the dough on speed 1-2 for less than 60 seconds.

Shape the dough and place it on a greased sheet. Allow the bread to rise 40 minutes. Make three slashes on the dough and brush with water. Bake for 35-40 min at 400F. Brush with water every 15 minutes.

Sunday, August 16, 2009

The Toddler Wants to Bake Pie UPDATED


For two days now, A has been begging me to make a pie. I have no pie fruit, no cans of pie filling. What to do?! I scrounged around in the cupboard and found two boxes of instant pudding. Can you make a decent pie out of INSTANT chocolate pudding? We'll find out!

Without further ado, the "Toddler wants to bake pie and the cupboard is bare" Pie recipe:

A's Chocolate Pie
10 graham crackers, crushed
1/3 C butter (or whatever's left in the tub in this case)
2 Tbs sugar
2 boxes chocolate pudding
2 squares of baker's chocolate, melted
2 cups milk

Melt the butter in the pie pan in the microwave.

Add grahams and sugar and press into the pie pan to make a crust.

Blend pudding mix with 2 cups of milk with an electric mixer.

Fold in melted chocolate and scoop into the pie crust.

Refridgerate for an hour.


It's cooling right now so we don't know if it's any good, but the spatula tasted wonderful! A went through three clean shirts while licking various chocolate-covered tools, so it will probably be a hit.


UPDATE: Served chilled with cool whip on top, this pie is definitely a repeatable experience. It disappeared and the adults fought over the last two pieces.

Wednesday, August 5, 2009

Peanut Butter Chocolate Cookies

The toddler informed me, upon picking her up from daycare, that she wanted to make cookies. So, we went home and put together some peanut butter chocolate cookies with dark and milk chips. They're in the oven now and I can only imagine that they'll be delicious. The original Dark Chocolate and Chip cookie recipe has been easy to adapt to a number of different variations over the years and all have been fabulous. 8 minutes until we know!

The Chocolate Cookie
1/2 C butter
1 1/2 C sugar
2 eggs
2tsp vanilla
2C flour
1/2 C cocoa powder
3/4 tsp baking soda
1/4 tsp salt
1-2 C chocolate chips, mixed milk and dark
1/2 C peanut butter

Beat butter, sugar, eggs, and vanilla until smooth.

Add cocoa, baking powder, salt and flour, mix.

Fold in chocolate chips and peanut butter.

Bake at 350F for 11 min.

Wednesday, July 1, 2009

Red and Green or White and Red

This week's recipe: Quinoa Salad with Black Beans and Corn. We liked it so much, we had it twice! The first time, we used white quinoa with a red pepper, and the second time we used red quinoa and a green pepper. You wouldn't think it would make a difference, but it does! I picked this gem up from the babyfit.com website.

Quinoa Salad
1 1/2 C raw quinoa
1 15 oz can of black beans, drained and rinsed
1 can of sweet kernel corn, drained
1 1/2 Tbs red wine vinegar
1 bell pepper, chopped
4 scallions, chopped
1 tsp garlic, minced
1/4 tsp cayenne
1/4C cilantro, chopped
1/3 C lime juice
1/2 tsp salt, plus more to taste
1 1/4 tsp ground cumin
1/3 C olive oil

Prepare the quinoa as directed on package.

Mix beans with vinegar and salt and pepper to taste.

Add beans, corn, bell pepper, scallions, garlic, cayenne, and cumin to quinoa and mix well.

Whisk together lime juice, salt, cumin, and add oil while whisking. Add to the salad and salt and pepper to taste.

This tastes even better as leftovers.

The husband requested an immediate repeat, while the toddler turned her nose up the second time I served it. I think that's more about her being 2 years old than her not liking it, though.

Thursday, June 18, 2009

Toddler-Adult Translation

"Feek, Mama!" Speaks, Mama! as in Martha Speaks.

"you fink." you think and tell me the answer.

"I need foon." I need a spoon.

"Fwirrel!" squirrel!

"I'm so cold!" Pick me up and snuggle me. I don't care if it's 90F out.

"I need tension." Come sit next to me while I poop on the toilet.

"Here you go! I got the momter!" Here's the baby monitor, I brought it up from downstairs, even though you don't need it up here.

"Next time I listen." Please stop lecturing me. I already had my time out and want to go play.

"I only wub you foh much." I always love you so much.

Wednesday, June 10, 2009

Sloppy Garden Joes

Another husband-approved dish! This one comes originally from www.babyfit.com. I have made a few small alterations to it, with great success. It has officially been placed on the "make again" list with a recommendation to try it out with various types of BBQ sauces.

Sloppy Garden Joe's Chili
  • 1 onion, chopped
  • 1/2 green pepper, chopped
  • 1 lb. ground turkey
  • 1 8 oz. can tomato sauce
  • 1 15 oz. can stewed tomatoes, not drained
  • 1 8oz. can mushrooms, drained
  • 1/2 cup barbecue sauce
  • 1 15 oz. can of black beans, rinsed
  • 1/2 tsp garlic powder
  • 1/4 tsp oregano
  • 1 tsp liquid smoke
  • salt and pepper to taste
1. Sauté onions, green pepper and ground turkey in a pan over medium-high heat until turkey is cooked through. I added a little canola oil to the pan to keep the turkey from sticking since I was not using a non-stick pan.

2. Add tomato sauce, crushed tomatoes, mushrooms, beans, garlic, oregano, liquid smoke, barbecue sauce and seasonings and bring to a boil.

3. Reduce heat and simmer until the children are down for the night, stirring occasionally.

4. Serve with cheese, if desired.

Serves 8.

Monday, June 1, 2009

Nightly Prayer by A

"Dear God,
thank you for Papa, Nonna, Micky, Minnie. Once upon time I hurt elbow in the morning. Once upon time, once time. Daddy, Mama, Maggie.
Amen."

Wednesday, May 27, 2009

Pizza Crust Nirvana

I finally found a pizza crust recipe worth repeating! I have been searching for 15 years for one that I liked! Oh, my, stars! It's grand. The whole family devoured it!

Here it is: pizza crust.

We topped it with:

pepperoni
Italian sausage (chicken, with mozzarella cheese in it)
red pepper
black olives
feta

I used Ragu's jarred pizza sauce, gourmand that I am. LOL. It was divine. Seriously, the toddler ate three pieces all by herself! My husband did not complain about it being too doughy, and I did not complain about it being too hard/crunchy.

Next stop, grilled pizza...


Wednesday, May 20, 2009

Nola Bar Update

Nola bars made with Virginia peanuts, m&ms, and raisins are delicious. Also, lowering the sugar content made a notable positive alteration to the flavor. Less cookie-like, more satisfying.

Monday, May 4, 2009

Homemade 'Nola Bars

I tried a new recipe for granola/energy bars this weekend. I think I'm in love.

I got the recipe from Readers' Digest, of all places. Here it is.

I used walnuts, currants, and choc chips. Wowsa. I LOVE it. The sweetness comes largely from the chocolate chips, which surprised me. I think I could leave out the chocolate and then play with savory granola bars. Maybe do sesame and ginger? Craisin and orange zest?

YUM! The toddler approves, too.